Sherlock Holmes and the Mystery of the Mummy Walkthrough -- the Wine Cellar
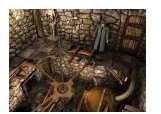
The Wine Cellar
Sherlock Holmes and Doctor Watson often engage in a bit of wine, but they do not have time to sample the wares found in Lord Montcalfe’s cellar. The statue that you put the scepters into opened a secret room that took you to the basement of the Egyptian museum.
The entrance area contains matches and a water flask. Pick up both these items. The signs that someone still lives in this supposedly empty mansion continue. Have Holmes examine a dinner plate. Go forward and turn to the left. A cot has been set up in this room. The cot also shows recent signs of use. Try to open the trap door on the floor and find that you cannot. Get the Hammer, Bottle of Liqueur , and a gin bottle. (The last item has been hidden.) Go into the rest of the cellar and look for the items to make a torch and for something to open the trapdoor with.
Turn right and move Sherlock Holmes and Doctor Watson forward two times. Look around the area until you find a bottle of Bordeaux, a bottle of touraine and a bottle of Spain Wine. Pick up the stick from a nearby shelf.
Go back to the cot. Look under the cot and find the statue of Anubis. Use the hammer to break open the container and find a small Anubis Statue. (One of the clippings you found mentioned a stolen statue.) Turn around and face the door way pick up second stick. A few rags lay on the ground nearby pick up those up as well. Combine the rags with the sticks in your inventory to make a torch. Dip the torch in the bottle of gin and light it using the matches. You can now see through in the darker areas of the wine cellar.
Place the bottle of Touraine next to the bottle of Bourgogne.
Place the bottle of Spain wine next to the bottle of Touraine.
Place the bottle of liqueur in the last open position
The panel slides open. Save your game and solve a simple ascending slider puzzle in five minutes. (It’s relatively simple and does not need much explanation.) You’ll reveal a silver button. Press it and enter
The Laboratory

A file cabinet rest on the left side of the wall. Open it and read the book in here. Learn more about Lord Montcalfe’s interest in Egyptian mysticism. Find several other notes detailing Montcalfe’s nightmares, a surprise for the distrusted Johnathan Parkey, some notes on Egyptian myths and legends, and another note stating that the missing estate owner had seen the dreaded walking mummy.
Look at the table. Examine another note about the dangers of overdosing on laudanum. Find the blue book. Holmes quickly finds the relevant passage that reads, “We note that most of civilization distinguished primary elements such as fire, water, air….etc.”
Look to the right and see the desk and the chair. The desk drawer might contain valuable clues. Click on the chair to move it away from the drawer. Click on the drawer to found out that it is locked. Holmes lets you know that the lock needs two keys. Turn around and examine the workbench in the room.
Pick up the green book. Read about the caste system an India and read the note from Lord Montcalfe about how reincarnation works. The journal contains more information about the missing Lord’s plans.
The missing Lord remains suspicious of the Dawn of the Gods society. He must find a stolen Anubis statue to stop the spell triggered by the disappearing mummy. The book also contains more information about Johnathan Parkey and items Montcalfe does not want to fall into Parkey’s possession.
Sherlock Holmes and the Mystery of the Mummy – the Laboratory continued
Head to the right, along the worktable then turn left. Find a key in a wooden box. Read the study on the reincarnation on the table and note the new bandages sitting beside the book. There are broken tiles here and a pouch of sand on the floor. (Perhaps someone is trying to impersonate an Egyptian mummy?)
Go to the right. Go forward two times and turn around. Click on a blue terracotta cot to get a key from it. Go back to the table near the cabinet and find a note on it. It reads - S = CW, D = ACW. A message scrawled beneath this cryptic clue says “both at the same time or you’ll be dead.” Pick up the oil flask from underneath the table. Turn around to face the desk and move the cursor above it slightly. Take the third key from a niche in the wall. Move off the desk and find the locked door in this room. Use the oil on the lock to lubricate it. Select a key from your inventory. Open the door.
Turn back to the desk. Remember the dire warning contained in the note? There’s another puzzle here. If you fail to solve this puzzle, Sherlock Holmes dies.
Insert the key with the G symbol on the right side, put the key with the half-moon symbol on the left. Turn each key towards the outer arrow once and then follow the key indicators. Solve the puzzle and the drawer opens. Take another statue.Remember that door you unlocked just a while ago? Go back through it.The missing Lord remains suspicious of the Dawn of the Gods society. He must find a stolen Anubis statue to stop the spell triggered by the disappearing mummy. The book also contains more information about Johnathan Parker and items Montcalfe does not want to fall into Parker’s possession.
Head to the right, along the worktable then turn left. Find a key in a wooden box. Read the study on reincarnation on the table and note the new bandages sitting beside the book. There are broken tiles here and a pouch of sand on the floor.
The Storage Room
The basement of this mansion seems to have more rooms than the first and second floor did. The locked door led to a storage room. You’ll be able to see a small light source at the end of this room. Walk over to it and pick up the oil flask and the bottle of oil. Put the bottle of oil in the oil flask.
The five urns lined up along one of the walls mean nothing until you click on one and receive a cryptic comment about needing to see from the beginning. This is yet another puzzle that must be solved.
The key to this puzzle is putting items that represent the four classic elements in each urn. The symbols determine which element goes where. Most players should be able to solve this puzzle without too many problems. When you solve the puzzle, a sound comes from the doorway. Go back to the now closed doorway. Look on the left side and see that another timed puzzle has appeared. It’s a good thing you have the mind of the world’s greatest detective backing you up, isn’t it?
Read a riddle that points to the cast system of India. The reader can spend time figuring it out, but it is easier to arrange the letters in the following order: S,V,K, and B. Watch a cut scene after placing the K. Go towards the back of the room and get another statue from the urn. Leave the storage room and go to the other door. This door would not open when you first came into the laboratory, but now Holmes and Watson should proceed into the next room.
Sherlock Holmes and the Mystery of the Mummy – the Rotating Room
As the name implies, this room rotates. Figuring out how to get where you want to go in this room takes practice. Go towards the center and then venture in the intended direction. Click on all four of the statues and another niche opens. Pick up your fourth Anubis statue. Pay attention to the fixtures in this room. Knowledge of the fixtures here becomes useful later in the game.
Go back into the storage room. Select the Brahman seal from your inventory and use it on the fifth urn. Holmes makes a comment here that is not useful at the moment. Go back into the rotating room. Click on two statues to ensure that the far door behind you. Go to the far door and read another riddle. The riddle is an old Anglo-Saxon riddle. You solve the puzzle on your own or type in the word “nothing” to proceed. Open this door and move into the antechamber for the treasure room.
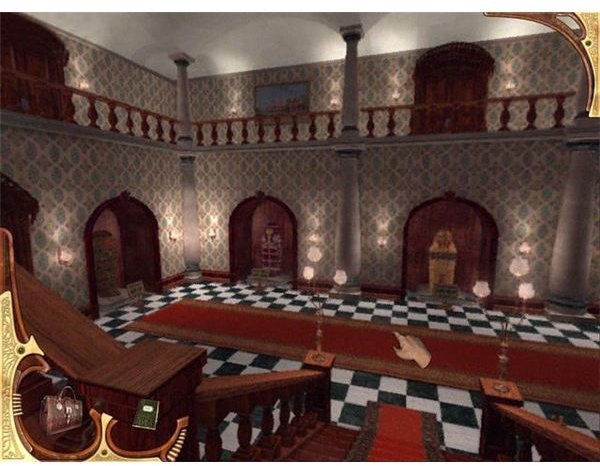
The Treasure Room Antechamber
This is the last room for the third part of Sherlock Holmes and the Mystery of the Mummy. Venture into this room and solve another puzzle. This is a balance puzzle similar to the ones found in the DS game Professor Layton and the Mysterious Village.
Take the little bucket and fill it.
Dump the little bucket in the big bucket
Select the vials on the left to put the little bucket down
Dump the big bucket on the floor on the dark spot between the cask and scale
Pick up the small bucket and poor it into the big bucket
Repeat this process two more times.
Fill the little bucket again
Put the little bucket in the big bucket
Place the Bucket on the Scale
Then another puzzle opens up that involves a chessboard. This one is simpler. Place the four Anubis statues on the corners of the chess board and watch another cut scene. A pedestal arises from the center of the board. Johnathan Parkey walks in carrying a fifth statue and a gun. The mummy pulls a lever and Parkey falls through a trap door.
This post is part of the series: Sherlock Holmes and the Mystery of the Mummy Walkthrough
Lead the great detective and his companion Dr. Watson through the residence of the missing adventurer and archaeologist Lord Montcalfe in this game.
- Sherlock Holmes: The Mystery of the Mummy Walkthrough
- Sherlock Holmes and the Mystery of the Mummy Walkthrough Part 2 of 5
- Sherlock Holmes and the Mystery of the Mummy Part 3 of 5
- Sherlock Holmes and the Mystery of the Mummy Walkthrough - Part 4 of 5
- Sherlock Holmes the Awakened Waltkhrough Part 5 of 5