Metroid Prime Trilogy Boss Guides: Metroid Prime 2: Part 2
Last Time…
By now, Samus has several of her helpful tools and weapons back, along with a Dark Suit to protect her from most of the damage Dark Aether’s atmosphere will deal to her. Now it’s time for some of the tougher bosses in the game, and defeating those bosses is the only way Samus can gain back all of her power and stop Dark Samus.
Boost Guardian
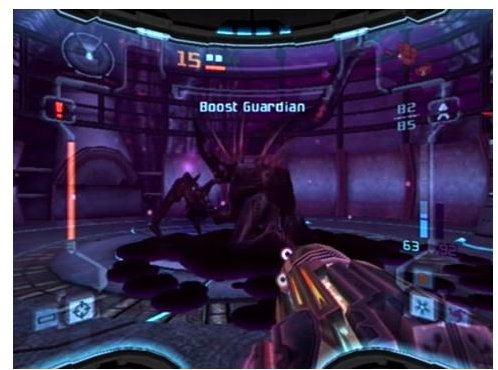
The first thing you’ll notice about the Boost Guardian encounter is that you’ll have no light filled safe zones to protect you, so take this boss out as fast as you can! The boss will, at first, act like a regular Warrior Ing, swiping at you, trying to possess you, and wriggling around the area in puddle form. Dodge its pitiful attacks and fire away with the light beam until its puddle form starts to glow red.
It’s at this point that the battle gets tough. Little Ing will show up randomly to get in your way, while the guardian shoots around the room like a pinball. Any pillars or Ing that get in the way will be destroyed, leaving behind much needed energy and ammunation. After several bounces, the Boost Guardian will pause long enough to charge up another boost and aim itself directly at you.
While you’re not as fast as your foe, Morph Ball mode will be your best bet for dodging. And if you ever want to get the boss out of its own ball form, you’ll first need to stun it with a few well placed morph ball bombs. When it does get back on its feet, hurry back out of Morph Ball mode and start shooting light beams at it again. Eventually it will begin to use the standard piercing energy beams that the big Ing are so fond of.
This is a tough boss, but with a bit of practice and a cool head, you’ll take it out eventually.
Alpha Blogg
Despite an unfortunately comical name, the Alpha Blogg is a fearsome creature that fancies vision impairing sonic projectiles and fierce lunges.
Effective weaponry for this fight includes charged power beams, dark beams, and missiles. If you can time it right, however, super missiles are also good. To damage the Blogg, you’ll first need to fire at it to get it to charge at you. As it draws near, it’ll open its maw to take a bite out of you. It won’t give you much time to fire, but its open mouth is the only place where weapons will damage it. Fire a weapon of your choice and quickly dash to either side to get out of the way.
Apart from the small window of opporunity, this fight isn’t that difficult.
Grapple Guardian
Much like the grenchlers you’ve already seen, the weak spot on the Grapple Guardian is its back. Fire power beam shots into its
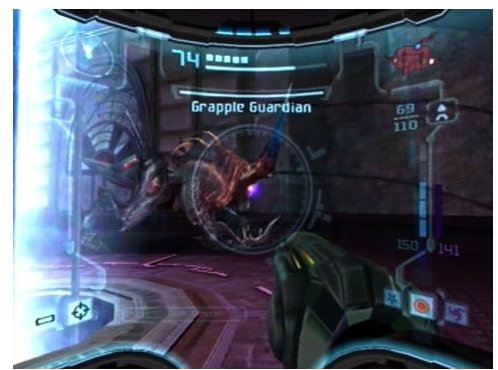
single eye and keep your distance to keep it from making an attack against you. With enough shots, you’ll stun the beast, giving you time to fire off some light beams into its back for some decent damage.
When it recovers it’ll head straight for you, and will now begin to launch grapple beams from its horn. In the event that one of these beams hits you, blast its face until you stun it. Now, shooting its face won’t give you enough time to hit its back. Now you’ll have to place yourself in between it and one of the two charged pillars in the room, and wait for it to latch onto one of the pillars. The creature will electrocute itself, stunning it long enough for you to get in a few good shots on its back, and hopefully blowing off the shell on its back.
While on its last legs, the Grapple Guardian will speed up considerably, and you’ll have to shoot it in the face again to stun it. As dangerous as it is, you’ll want to stay fairly close, as you’ll only have a few seconds to hit its exposed backside before its electrical energy resumes protection of that weak spot.
Chykka
The boss begins in a larval form, and will swim before leaping over your platform and back into the water. As it leaps above you, it will spit a projectile at you; and as it reenters, the water level will briefly rise and cover the platform. Naturally, you’ll want to space jump to avoid touching the water when your platform is submerged. Lock onto the creature and dodge the projectile, and fire away at its belly before it splashes down in the water. During the first part of the fight, little creatures called Dark Shredders will appear to make the fight just a little bit harder.
Once you’ve hit Chykka enough, it will flop up onto your platform and try to pull you in with a long, sticky tongue. At this point, fire away into its face with light beams until it becomes stunned, and keep firing until it retreats. Repeat until its health is is gone.
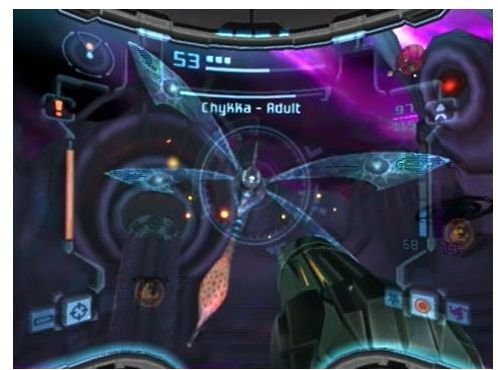
As the water level recedes, your platform will split into three, and grapple points will appear in the room. Chykka will emerge in its adult stage, spitting water at you in an attempt to push you into the water. Blast it with the power beam or dark beam until you stun it, then grapple to another platform to launch super missiles at one of the four red spots present on its back. Repeat until all four red spots are destroyed.
With half of Chykka’s health gone, it’ll dive back into the water, sending an easily jumped wave your way. When it emerges, it’ll be in its third form. Aim for the bloated sac that the creature is toting around, and fire light beam shots at it to damage Dark Chykka. To defend itself, Dark Chykka will spawn a swarm of small insects, or try to blow you off of your platform and into the water. With enough damage, Dark Chykka will return to its normal adult form.
The strategy doesn’t change from here, apart from Chykka becoming a bit faster. Destroy the red spots on his back once more, then fire light beam shots at it once it becomes Dark Chykka again. It’s a lengthy fight, but by the time Chykka enters its dark form a second time, it should be just about finished.
Spider Guardian
Scan the boss before the fight, as you’ll be spending the entire fight in Morph Ball mode. You’ll have to navigate through the area’s
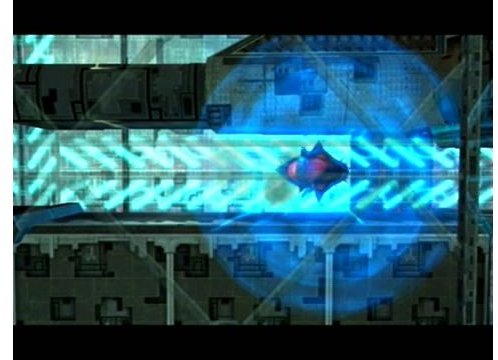
tunnels while the boss wanders around in the blue highlighted paths. To defeat this boss, you’ll need to open up access to power conduits via morph ball bomb slots. And to activate these slots, you’ll need to change the guardian’s damaging aura from blue to green by hitting it with six bombs. The bombs will stun it, but if you let it recover before its aura turns green, it will instead turn red, and speed up. The boss’ aura will stay green for a limited amount of time, so hurry to the bomb slots to get it to slam into the power conduits.
In the first section, simply get ahead of the boss as it moves about in a linear pattern, and lay enough bombs to activate the bomb slot. Head up to the slot and bomb it, then follow the boss to the next section.
Use the half pipe in the second section to boost up onto the track, and repeat the strategy to make the insect open up the next section.
In the third section, boost up the right side of the ramp to reach a point where you’ll be able to hit the boss with your bombs, then boost up the left side to hit the bomb slot.
In the final area you’ll be faced with four parallel levels, three morph ball bomb slots, and three energy conduits. Proceed with the usual strategy to activate the first bomb slot, causing the boss to proceed to the second level and hit the first conduit. Repeat the process two more times, first hitting two bomb slots, then hitting all three to finish off the boss.