Majesty 2 Walkthrough - The Demon's Advisor Mission - Strategy for Setting up your Heroes and Finding Enemy Locations
The Demon’s Advisor
This part of the Majesty 2 campaign covers the next to last step in your fight against the demon. In this expert mission your main task is to find and eliminate the Demon’s advisor. This character is tough. He has 50,000 hit points and is protected by elementals and small demons. Other side quests include protecting the trading posts for the merchants, destroying the dragon lair and eliminating the ogres (and caves).
Getting Started
The ogres will attack right away. They are located on the west side and will try to destroy any buildings in their path. Prepare yourself by building a warrior, ranger and cleric guild south of your castle as close to the lake as you can. Then build two towers on the left side of the castle. Upgrade them when you have enough gold.
Now, hire all three warriors, a couple rangers and a cleric. Research the Majesty healing spell at the cleric guild. Place an explore flag southwest of your castle. There will be 3 ogre dens. Set attack flags one at a time and destroy the dens, starting with the one closest to the town. As ogres head for your town, set attack flags on them so your heroes can kill them off.
Once the ogres are gone you have a short breather. Build a marketplace and a blacksmith and hire the rest of your heroes.
Other Enemy Attacks
Small demons will start attacking your town in a relatively short amount of time. They are located on this Majesty 2 map to the north and northwest of your town. Demons come in waves and your regular towers will not be enough for defense. You can use the Scepter of Sidrian (Majesty item at the top of your screen) to help control the attacks. Located southeast of your town are werewolf and regular wolf dens. There is also a dragon in the northeast. He will not attack in the beginning of the game, unless you accidentally uncover his location. However, once he appears, you will need to be prepared to destroy him and his den.
Stronger Defenses and Heroes
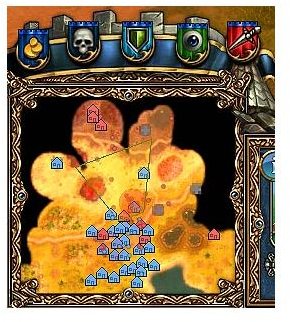
To build up your gold you will need trading posts in addition to your marketplace and blacksmith. One of your side missions is to protect nearby trading posts from being destroyed. You can locate them on your Majesty 2 map north and northeast of the town. Before building, be sure to destroy the enemy dens next to them.
By this time in this Majesty 2 walkthrough, you should start working on upgrading your blacksmith and castle (to the second level) so you can hire dwarves and build dwarf towers. Once you have access to the dwarf towers, build one on each side of the castle. You will also want to upgrade your other hero guilds and research the dwarf Majesty spell (which can restore buildings).
Hire dwarves and build a Hall of Lords so you can get a couple of extra high level heroes. Build a wizards guild so you can build a Magic Bazaar. You will also want to build a tavern so you can create parties of heroes (your castle needs to be at level 3). Build your parties with a warrior as the leader and include a dwarf, cleric and ranger.
If you are following this Majesty 2 guide, you should have enough gold to build temples on the sacred ground areas. Two sacred ground areas are located north and one is northwest of your town. Build the Temple of Agrela first on the northwest side and upgrade a couple of your clerics. Research the resurrection Majesty spell through their temple. Then build a Temple of Dauros or Temple of Helia on the sacred ground area just north of the town. Promote a couple of your warriors and rangers. Place the last temple in the far northern area when you are ready to attack the Imp advisor. Placing the temple in this area draws the Imp and his elementals out, so you need to be prepared.
Portal to Hell, Elementals and the Demon’s Advisor
Since the demons will constantly attack, it is necessary to destroy their dens to prevent you from being overwhelmed. If their “Portal to Hell” dens are not visible on the map, set an explore flag northwest of your town. Then set attack flags one at a time to destroy the three demon dens.
When the Dragon starts attacking, you should be prepared to destroy his den. If his den is not uncovered, place an explore flag northeast towards the top of the map. Then place an attack flag to destroy it.
The Demon advisor is located to the North, at the top of the map. Don’t attack this area until you have eliminated the dragon and small demons.
Killing the Demon’s Advisor
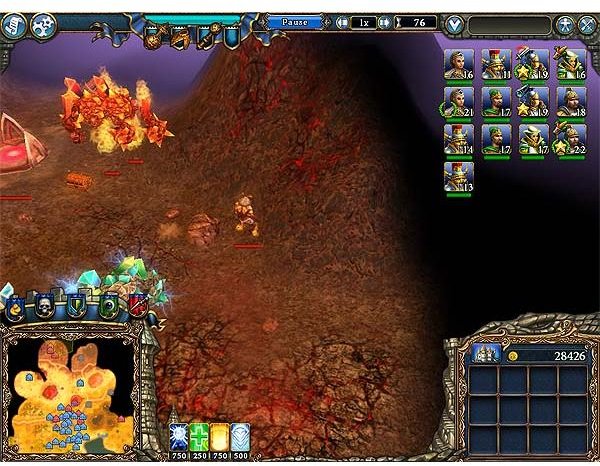
By this time, your heroes should be prepared. The Demon’s advisor is not easy to kill. At 50,000 hit points, your heroes need good armor, weapons and potions to survive. An easy way to draw him out is to build the third temple in the far north. This way, not all the elementals will be with him. When he moves towards you, set an attack flag on him for a large bounty. As your heroes are attacking, watch their health status. Use the Heal spell and Scepter of Sidrian to help you out. If you have built the temple of Dauros, make sure you have researched the Holy Shield spell. It will be useful against the Imp and elementals attacks. As soon as you kill the Imp advisor, you will have successfully completed this mission.
This post is part of the series: Majesty 2 Walkthrough - Taking on the Tough Missions
This is a Majesty 2 walkthrough series that discusses the strategy in handling some of the most challenging missions in its campaign. Filled with spoilers, it can help give you an edge in completing those frustrating areas that you may have a tough time figuring out.