Killzone 2 Walkthrough Campaign Game Guide - The Cruiser and Maelstra Barrens
The Cruiser
The battle continues on the Cruiser in the next part of Killzone 2. Use the lifts to ascend to the bridge and report to the Colonel Templar. Don’t bother looking for any Helghan symbols on the Cruiser, it’s your own ship and it wouldn’t make any sense (there aren’t any to be found here). Colonel Templar will tell you to defend the gun deck. On the gun deck you will find a variety of enemies to eliminate, including Sentry Bots, flamethrower troops, and a Heavy, It’s a tough fight, but one that you can definitely win. Make use of the M224-A1 LMG during this part, they’re located on gun racks through out the gun deck.
Try the AA Gun. Shooting the larger aircraft probably won’t work too good, so concentrate on clearing the skies of the leech pods on your radar (the red highlighted craft). They will start the evacuation when the air has been cleared enough to allow for the process to begin, so don’t shoot your own aircraft (blue highlighted craft). You need to knock as many enemy aircraft out of the skies as you can before the AA Gun uses up all its available ammunition.
Get on the lift with Natko and move as fast as you can to the designated evacuation area. Enemy soldiers will make it onto the evacuation craft, so watch for this and take them out. The resistance as you try to travel to your destination will be intense as it should be, but the adrenalin keeps flowing and your always sitting on the edge. There’s only one Intel file to be found on this stage. You can find it in Emergency Stairwell C area on the top deck leading to the EXO suit hangar (just past the gun rack with the M82 rifle). Watch the long cut scene when you reach the hangar. It’s amazing to view, and is a good example of why Killzone 2 is such a popular title.
Maelstra Barrens
In this section of the Killzone 2 walkthrough, you will be rocking the Helghan world in the EXO suit! You are gifted with unlimited ammo for this part, so let your little devil out on the barrels at the beginnning. If you’re using your machine gun keep as eye on the glow of the barrel. The machine gun fires so fast it’s in danger of overheating and you need to monitor this or your machine gun could be unusable. You can also regenerate your health when in the EXO suit and not under fire (this is the same as when your on foot). Keep your ears open for any alarm that might be going off, if you do hear one, this means you are about to detonate and need to rethink your current situation. Try to watch out for RPG fire when you’re using the EXO suit, this kind of attack really takes its toll on the EXO suit, so take them out before they get you or avoid them if possible.
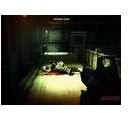
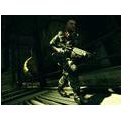
Screenshots

Visari Palace
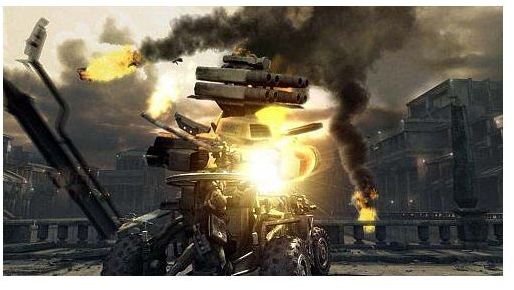
When you get to the tank sitting on the bridge, you can certainly take him on, but you’ll lose. Instead ascend the stairs to the right and go around the tank. Once past, run up the right side to flank the machine guns that are suppressing your squad and keeping their heads pinned to the ground. Travel through the bunkers and you’ll confront a Hig Armor tank that shows up to try to ruin your day. Just take the Missile Launcher off the handy rack and scrap the armored caddy.
You have to put four D-charges on the consoles inside of each tower in the next part, but keep your eyes open for trouble. There are a few Heavies making the rounds in the area. Once you take out the towers, battle through the enemy defenses and jump on the elevator with Rico. You can forget about taking out the ATACs and run across the bridge to the other side (you’ll also see a Helghan symbol on the wall to the left as you enter). Once you are in the courtyard, don’t try to go straight up the middle. Instead take the right or left path. The important thing to not forget is that the enemy is really just trying to push you back and you need to always move forward to make it to the next area.
An ATAC will put itself in your squads path in the next part of Killzone 2. Take your handy light machine gun in your hands and turn him into pieces. The ATAC isn’t really that hard to beat at this point. Use the Grenade Launcher for battling through to the palace entrance. There is also lots of ammo around for you to use.
Radec Boss
Radec is actually kind of wimpy boss and the challenge he provides is average. However, he can warp around which makes it difficult to target him. Fortunately, like many killers he has the habit of talking too much. Use this against him and listen to his voice to pinpoint his location. Take your time. The more damage you deliver to Radec, the more his ability to stay hidden will decrease and the more damage you can deliver to him. Don’t wander too far from Rico, you need his added fire support to take Radec down.
It’s necessary to stay on the move to beat Radec, so there’s a balance here. You should make sure to reload whenever possible in case Radec decides to rush you with his knife, which he’ll do occasionally. Once Radec has received a certain amount of damage, he’ll decide to pull back to a far balcony. Stay behind cover when you can and just shoot from distance to finish Radec and once and for all take him down.
References
- Screenshots created by Sheila Robinson.
This post is part of the series: Killzone 2 Walkthrough Guide for PS3
This Killzone 2 walkthrough guide provides details, strategies and tips for surviving the campaign missions. Follow the tips and hints and it will help you make it through some of the tough challenges of the game.
- Killzone 2 - Surviving the Challenges of the Corinth River
- Guide to Killzone 2 Campaign: Blood Meridian & Visari Square
- Killzone 2 Campaign Walkthrough: Salamun District & Salamun Bridge
- Killzone 2 Campaign: Suljeva Village & Tharsis Refinery
- Killzone 2 Campaign Guide : The Cruiser, Maelstra Barrens, and Visari Palace