Half-Life 2: Episode 2 Walkthrough - Freeman Pontifex - Zombies and a Warehouse Puzzle
Zombie Shootout
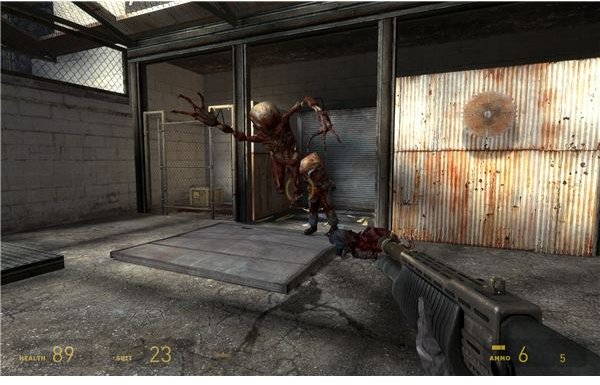
It’s you and Alyx against a lot of zombies pouring into this room. No problem. Directions are given as if you’re facing Alyx’s sniper perch. Stay on the platform for a minute and help Alyx thin out the zombies coming into the room. After a little bit, they’ll tear down your platform and dump you into the middle of the room. Just go to the far side of the room and look at Alyx. The zombies will pour in from the top left. She should be able to get just about every one of them. The only danger here is the poison headcrab carrier behind you. He can throw the headcrabs over the broken glass and into the room.
After the second wave of zombies from the top left, they should manage to break down a gate to the right. Use your shotgun to take out the first fast zombie and the first 2 zombines. Alyx can probably handle the rest, but stay alert. While you’re mopping up the rest, they should break down the fence at the back left. Just take out these last few zombies yourself with the old shotgun. You can then safely gather supplies and move out toward the back tunnels. For reference, it’s the only lighted path.
The Warehouse Puzzle
You’ll enter a warehouse area. Follow the little path and then crouch under the shelves to move along further. Half of a fast zombie should move toward you, so blast him. There should be a barnacle covering the exit. Use the gravity gun to feed it a barrel, then crawl out. There’s another half zombie in here. Just nail him with a barrel.
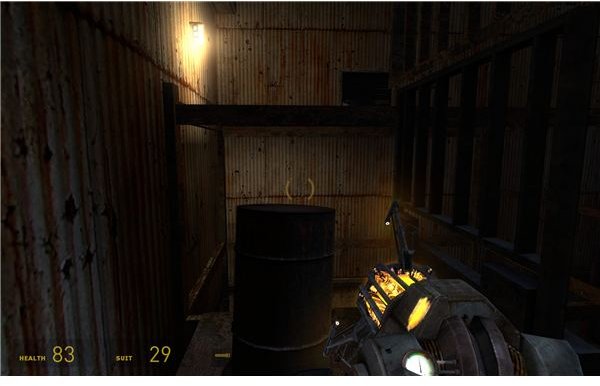
You need to get up on the first shelf and then follow the makeshift stairs up and around until you get to the gap. Just jump and press against the next “step” to get up. You should come to a forklift. Kill the black headcrab that drops down and then jump down to the forklift. Put a barrel on it and then flip the switch. Quickly jump on and ride it up. You can stand up on the barrel and use it to jump up onto the tall shelf in front of you.
Break out the grate and crawl through the vents until you get back out in fresh air. Drop down the hole using the pipes as steps. Then just move on forward to the toxic wastes.
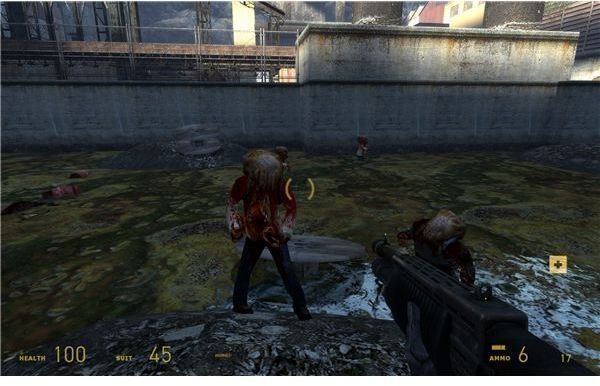
You don’t need the pallets for this part. Just jump correctly. Alyx should be able to snipe most of the zombies that pop up, but you should really keep your shotgun out to take out anything that emerges in her blind spot or gets too close. Jump from raised garbage patch to garbage patch and then follow the left wall. Kill any new zombies that spawn, since Alyx won’t have a shot in the back corner. Move over and jump up onto the little wall, and then get behind the fence. Blow up the barrel as the group of zombies move toward you. Then clear a path forward and up to the ammo crate. Get some more SMG grenades. You might as well get them.
A Little Jumping
Move forward and pull out your crowbar. Wait on your safe spot and let the poison headcrab zombie throw some headcrabs at you. Just smash them for easy kills. Use the wooden wheel as a safe spot and then get onto the pipes. Climb them and jump over to the lower spot near the car. Jump out onto the car and then onto the rocks. It’s a tough jump, but you should be fairly safe if you only fall in for a second.
Turn and jump over to the next rock. Leap onto the next white car, but don’t stay on it. It will sink quickly. Get onto the next set of rocks. You’ll probably fall a little short, but don’t panic. Just jump again and get out of the water. Pull the shotgun and help Alyx kill the zombies that emerge. This is a good spot to make a stand. Push the wooden wheel out into the water and then jump out onto it. Pull over the next wooden wheel from the next area. With these 2 as stepping stones, it is an easy jump. Use another wheel as a platform for your final jump to that ladder. A bunch more zombies and zombine will emerge as you move over. It’s actually not worth fighting them, especially since there’s nowhere to go if one pulls out a grenade. Just jump over to the platform and start climbing. Zombies can’t climb and the zombine should actually blow most of them up in a failed suicide attack.
Go over to the office on the right. Blast the fast zombie lying on the ground. You should be able to kill him before he attacks. Take out the headcrab and then gather up all the ammo in here. Another zombine should shamble over to the door when you try to leave. Just blow it away. If you want, you can get another supply crate by climbing the ladder.
The Bridge Puzzle
You’re basically in the clear as far as enemies go. Step out onto the bridge and wait for the portal storm to pass. This will naturally complicate our task, since we now have to jump the gap. Don’t worry though. It’s just a giant seesaw puzzle. Jump onto the semi truck and carefully get onto the rail. Step out onto the semi’s roof and get ready for a jump to the metal supports sticking out from the concrete. Do not jump on the cement part to the right. That whole thing will fall off spectacularly and greatly injure you if you’re caught up in it. Just leap onto the metal pipe and jump again to get onto the road and ride out the collapse.
We need to shift the cars off of the far end and onto this part to make it a working ramp. Just use the punt function of the gravity gun to push the cars forward from the end. Once you move most of them, it should do a big shift. Don’t jump back just yet. You have to drive on this part, so make sure that the path itself is clear. Push the cars and make a little path so you don’t wreck and fall off of the bridge. That counts as a death.
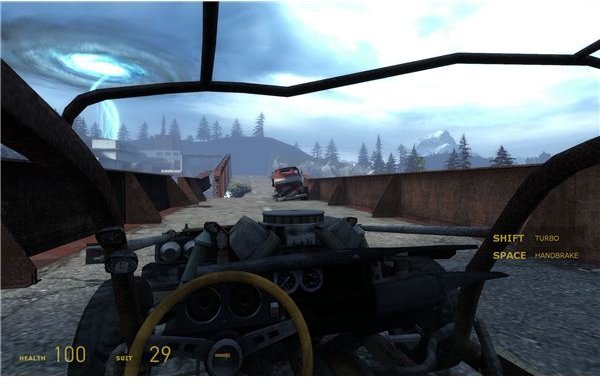
Jump off the low end of the bridge and run back up to the car. Get inside and reverse back to the end of the road. Then floor it and jump the gap. Do not use your turbo, it will just make it harder to control the car. Steer around the wreckage on the middle section and then line up with the road for one final jump. You can use the turbo now to be sure, since you’ll just crash into the gate ahead.
With the jump completed, we just have to have a little reunion. Jump out and climb up the little ladder to the left of the gate. Throw the switch by the dead rebel to let Alyx and the vortigaunt meet back up with you. Wait for Alyx to say goodbye to our friend and then jump into the car. The vortigaunt will power up the generator to raise the gate and then part ways with us. Once the gate is up, jump inside the car and drive into the tunnel. This brings us to the end of the chapter.
This post is part of the series: Half-Life 2: Episode 2 Walkthrough - Part 1
We’ve got a long way to travel with Alyx and her vital information. We need to make it through the long forest path all the way up to White Forest to join the rebel base. If you need any help getting past the antlions, zomies, and combine in your way, then look here.