Half-Life 2: Episode 1 Walkthrough - Chapter 4: Urban Flight - Combine Snipers and Forts
Back to the Streets
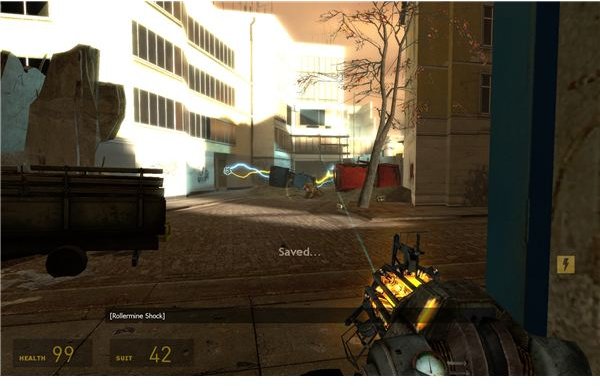
Okay. We’re finally out of the dark for once. We’re now trapped behind a fence though. Go back to the fenced in supply area and turn the wheel. Break open all of the boxes to get some much needed supplies. Also look around for the orange wheel. Pick it up and pop it into the little orange box by the fence. Turn it to open the gate and go outside.
Feel free to listen to Dr. Kleiner for a minute. When you’re ready to go, walk around to the back corner with all the sheet metal on the wooden frame. Pull it off and go through. Clear the next doorway, but then grab your gun. 4 Combine should rappel down into the alley. Help Alyx pick them off with your pistol. Once they’re dead, search the bodies for an SMG. Go out the end to spot a rebel fighting a few antlions.
There are 3 antlion burrows, but lots of cars. Use the gravity gun to block the 2 closest burrows. Push down the street but stop for a minute. Some Combine should rappel in around the third burrow. Back off for a second so that the antlions attack them. Then use the distraction to push the last car into the burrow.
Advance a bit more to the end of the street. Pull the boards off of the blue door and open it. Shoot the mine by the 2 Combine to blow them up at a safe distance. This also sets off a chain reaction and a bit of a fire though. You’ll need to put that out before you can advance.
Go down and to the left. Use the gravity gun to pull the supplies off the shelf. Don’t stand too close though, since the box will set off the mine. Go into the back room for a basic seesaw puzzle. Grab the 2 chairs from the area and set them right down on the pipes. Set them a bit out from the end though. This should immobilize the pipes and let you run up to the other side. Jump over to the propane tank and turn the valve until it shuts off.
Another Sniper
Go back out and rejoin Alyx. Head upstairs and wait for the first zombie to trip the mines. Pull over the rollermine and have Alyx realign it. Shoot it back over and let it wipe out the zombies. It should even roll down the stairs. If you’re lucky, it will roll out the door and start fighting the other rollermine. I personally thought that was one of the most awesome random moments in the game.
Go down and look outside to see the battlefield. There are antlions flying in over the wall to the left. There’s a sniper and a machine gunner in the street. There’s also a bunch of junk that you’ll have to hide behind. See if you can grab the rollermine and have Alyx realign it. That should really help the other one get its job done. Rush out and behind the little truck to the left. Then sprint out to the right side of the street behind the building. See if you can then advance from car to car.
Hopefully, one rollermine rolled forward and killed the machine gunner. If not, then grab one and throw it at him. The sniper shouldn’t shoot at you if you stay behind the car. Either toss up a grenade, or throw in a friendly rollermine. Either should kill them. Preferably, you can use the rollermine since you shouldn’t have many grenades at the moment.
Alyx Has You Covered
Wait a moment and Alyx will run up. Let her climb up to the sniper’s post and take up her position. Jump up and grab the ladder to climb over the fence and drop down. There are 3 groups of 2 zombies. Just move to the center and move around while Alyx snipes them. Once they’re dead, go through the doorway. Turn to the right and kill the poison headcrab behind the supplies. Then go upstairs. There’s one zombie and one zombie torso. Take this chance to knock the boards off the window so that Alyx has a clean shot. Advance a bit more to run into the big group of zombies and zombine. Fall back and let Alyx pick them off. Be very careful though, since the zombines will charge you if you get too close. Be ready to take them out if they run out of Alyx’s range.
Advance down the hallway and down the stairs. Break the supply boxes and heal up. Step out into the street to begin the assault on the Combine fort. Use the gravity gun to pull down the sheet metal shielding the soldier in front of you. Alyx will nail him quickly. Then push the car forward and cover up the burrow. Grab the oxygen tank and approach the gate. Shoot it into the group and charge through the gate. If you aren’t fast enough, then just wait a second and another group of 3 will come out. Kill any stragglers behind the gate with your SMG.
Get up on the fort and cover Alyx. A chain of antlions will chase her from the sniper position. Use the pistol or the shotgun to cover her. Once the antlions are dead, she’ll hack the console and open the door. It seems like the Citadel is degrading quickly though.
More Antlions
Go through the open door. Grab some more supplies and approach the door. 4 Combine come through the door and move over to the left side. Use the shotgun to score one shot kills on all of them at close range. Go into the next room and grab a pulse rifle off of the wall. Get some more supplies too. Charge up quickly at the other side of the room and then fall back when the doors start to chime. Take cover from the door breaching action and ambush the 4 Combine soldiers coming inside. Use the pulse rifle or the shotgun.
Charge back up at the health and energy dispensers and then head out of the building. Kill the Combine soldier with a shotgun in the corner ahead.and then go up the steps to the little office. Grab the supplies from the dead Combine soldier. Then drop down.
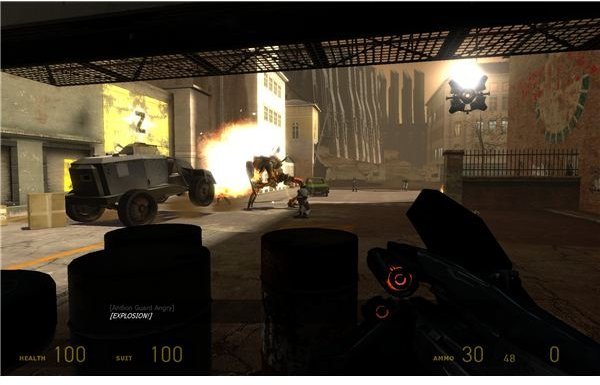
Watch the Antlion Guard attack the Combine APC and the soldiers. Just hang back and let it handle them. Nothing has really changed with fighting these guys. Just play matador and keep pouring shotgun blasts into it. You can also use the explosive barrels, if you want. Alyx should be able to keep most of the antlions off of your back while you finish it off. Once it’s dead, push forward with Alyx. Make sure that she can get to the machine gun position.
Alyx should be able to use this position to kill the antlions while you push the 2 cars forward and into each of the burrows. With the antlions sealed off, 5 Combine will rappel down into the fort. Ambush the 3 soldiers as they come out. Go forward and clear out the 2 waiting in the trench. Heal up using their health dispenser, and then go through the hole in the trench. You’ll end up in another room with a locked door. Be careful though. 1 hopper mine is waiting behind 3 explosive barrels. Pull it up and lay it back down to prevent one heck of an explosion.
Go through the air duct. Don’t bother climbing the first ladder. That path just drops you back with Alyx. You need to follow the full length of the pipe until it drops you down to the bottom of one very dangerous room.
This post is part of the series: Half-Life 2: Episode 1 Walkthrough - Part 1
Things have gotten a bit rough in City 17, and it’s time for us to get out. This means buying some time with quick repairs on the Citadel, an escape through the zombie filled sewers and a battle with the remaining Combine so that the rebels can escape.