Half-Life 2: Episode 1 Walkthrough - Chapter 3: Lowlife - Fighting Zombies in the Dark
A Trip to Dark Places
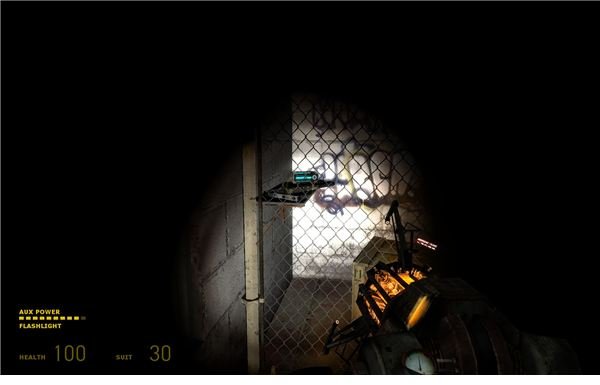
Okay. Your escape has gotten a lot more complicated. Alyx is freaking out though. Wait a moment for Alyx to recover and kill the forcefield. Then advance along the train tracks. The room ahead is full of zombies, so hang back and let Alyx kill them. It doesn’t seem like the turret is functioning, so you just have to focus on the zombies. You can use the gravity gun to throw some boxes around if you really want to help. Advance and stay close to Alyx. You’ll need her firepower. Use the gravity gun and some boxes to help out. Get to the end of the room and enter the dark hallway. The door at the end is sealed though. Look to the side to find the air duct behind a barrel. Knock the vent off and go inside for a little more vent crawling.
Crawl along and grab the health vial with the gravity gun. You don’t need the flare so just leave it or drop it down the vent. Turn to the left and climb up the ladder. Enter the next section and look down through the broken vent. Use the gravity gun to kill the headcrab below. All of the zombies are dead, so don’t worry about them. Drop down and use the flashlight. Look for the cage in the corner. Use the gravity gun to grab the red flare. This will activate it and give you a nice light source for the next minute. Go ahead and turn off your flashlight to recharge the energy.
Use the gravity gun to pull the shotgun and pistol up and over the bent part of the fence. Break the supply box and get the extra ammo that should be inside. Go ahead and get more health and suit energy from the open lockers in the corner. When you’re ready to go, pull out the pistol and shoot the lock on the fence door. Go through and use the flashlight to find the fuse box on the wall. Open it and then use it again to restart the power and open the door for Alyx. Use the gravity gun to knock away the cars blocking your next door.
Your Deadly Flashlight
Now, there are 2 things you’ll be short on for awhile. Light and ammo. If you try to kill all the zombies yourself, you’ll always be out of ammo. Alyx can accurately fire at anything though, as long as she has enough light. You need to use the gravity gun and the flashlight to get through these tunnels.
Go through and use the gravity gun to hit one of the zombies with the gas can. This will set it on fire and light up a good portion of the tunnel. Move to the left. There’s a dead civilian back here with a shotgun. Grab the extra 6 shells and start pushing forward. Help Alyx kill the 3 other zombies wandering around by the truck. Once they’re dead or you feel safe, turn off the flashlight and let it recharge. When it’s ready, push forward to the dead antlions. Use the gas can on the zombie and use the gravity gun on any surviving antlions. Alyx can easily kill them while they’re on their back. With the coast clear, push forward and grab some more ammo from the dead body. Then get onto the train.
Meet the Zombine
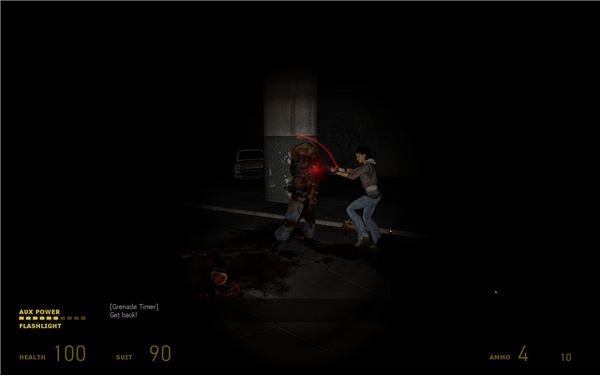
Go to the end to see your first dead zombine. Remember to turn off your flashlight and hold your fire. You’re safe here. Another zombine will rush up with a grenade for a suicide attack. It will blow up the glass and clear your path. Grab the pistol ammo from the end and then head out into the tunnel.
This is a tough fight. There are a bunch of zombine fighting some antlions at the end of the tunnel. Just hang back by the door for a second. Pull out your pistol and shoot a few of the red barrels. Don’t make them explode. Just use 2 rounds to set them on fire for some light. There are 2 flares here too. One is in the white van. The other is by the locked door. Just hold your ground and let Alyx do the heavy lifting. Your main mission is to watch the zombines. If one of them pulls out a grenade, use the gravity gun to grab it and throw it away. Other than that, Alyx should be able to take them out. She even has a special close combat attack for one-hit kills. Once the attack subsides, go forward into the tunnel. The door’s locked. Go forward more and look at the ceiling. Keep your light on the 2 barnacles so that Alyx can kill them. One drops a fast headcrab when it dies, so be careful. Go to the end of the tunnel and into the little supply closet. Go ahead and pick up the flare to activate it and give Alyx a bit of light while she covers the door.
Use the fuse box to start up the lights and open the door. This summons a zombie attack though. About 4 zombies and a few headcrabs should spawn and attack. Just hold your ground in the supply closet. When the coast is clear, go out and through the newly opened door. Head up the steps. Use the gravity gun to blast the poison headcrabs. Go around and pick up the shield batteries behind the barrels and in the locker. Your next goal is the gate through the fence.
Lots of Zombies
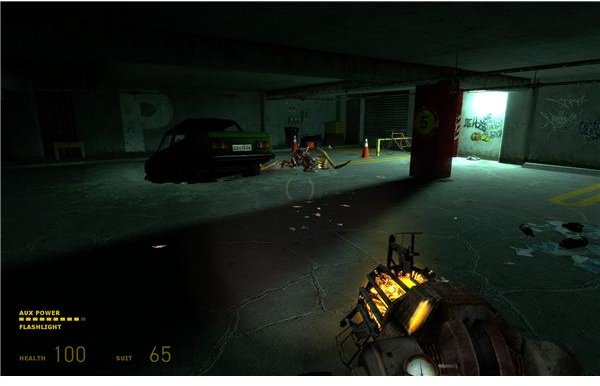
Go through the broken fence and into the car park. Use the gravity gun to push the car toward the hole in the ground. Hit it a few more times until it falls perfectly into the hole. This will close up the antlion burrow. If you’re quick then only a few will make it up. Help Alyx kill off the survivors. Once that’s done, use the wheel to open the gate. Alyx should be able to kill the poison headcrabs that come through.
Go into the next tunnel. Blast the 2 headcrabs that drop down and then grab the supplies. Turn toward the dark tunnel. In case you can’t tell already, it’s full of barnacles. Go forward just enough to trigger the zombie attack. Fall back and turn off your light. This will keep Alyx focused on the zombies and not the barnacles. Between Alyx’s gunfire and the barnacles, the zombies shouldn’t even get close to you. After that’s done, step into the tunnel and use your flashlight to light up the ceiling. Let Alyx kill all of the barnacles. Turn to the left and shoot the explosives barrels when you get to the end. This should hopefully kill the zombines. If not, shoot them. Go a bit further and shoot the last zombine that’s lying on the ground. Before you leave, go into the hole in the wall to grab a full health kit and 20 shotgun shells. Open the white doors and go up the stairs to start a tough fight.
This post is part of the series: Half-Life 2: Episode 1 Walkthrough - Part 1
Things have gotten a bit rough in City 17, and it’s time for us to get out. This means buying some time with quick repairs on the Citadel, an escape through the zombie filled sewers and a battle with the remaining Combine so that the rebels can escape.