The Ultimate Gears of War 3 Walkthrough - Act 2
Chapter 1 - Shipwreck
Washing up from the massive explosion, somehow all of you seem to have survived. You’re on the Hanover Coast. So now what?
Right when you start there’s an orange shipping container. Explore it and you can find Tomatoes - A Beginner’s Guide. Pick it up for your first collectable item.
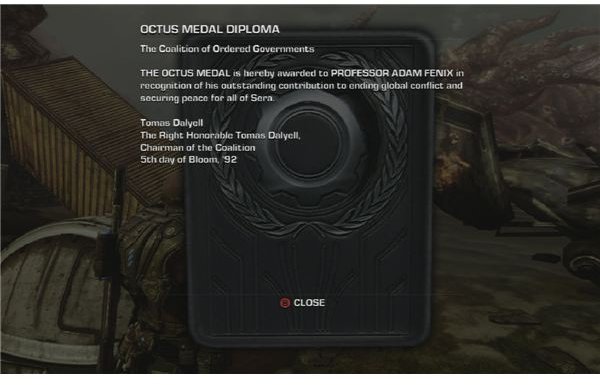
Fight through the first wave of wild tickers and savage enemies. They’re typical Locust, though they can prove a bit of a challenge with the limited weaponry you start off the Act with. Once you’ve bested them, make your way to the downed chopper and find the Octus Medal Diploma. Two down, two to go.
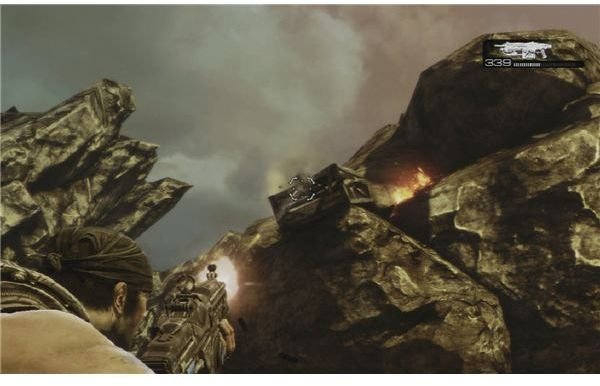
Watch out here for the Savage Boomers. They can shoot grenades underground and past cover, so you’re not safe until they’re dead. Next you get a set piece battle where you take control of a catapult beast to take down a couple of others and a Brumak. Once you’ve taken down the dinosaur, continue down the path along the rocks to the right. When you come across a Longshot, you’ll be able to see a wooden crate above you. Shoot it and you’ll find the Captain’s Log.
Fight your way past even more Savage Locust and you’ll eventually make it to Prescott. Not a big deal, nothing new to see. Once you find Prescott, look behind the cargo near him. Your next COG tag and final collectable for the area is there. Of course you’ll have to deal with huge swarms of Locust. Then the boss of the area, another Brumak, this time that you have to fight on foot! Amazing how the scale of the battle makes it harder. There’s a pile of ammo you can keep refilling at, so don’t worry about conservation. If you can get around behind it, shoot the tanks on it’s back to blow it up.
Now it’s time to cross the Deadlands, looking for Mr. Fenix.
Chapter 2 - House of Sand
You come across the Barge you shot down earlier, and now you’re tracking a still-airborne barge to hijack it. Should be easy, right? Well this chapter is quick. There’s no collectables at all!
The Deadlands are a barren, parched wasteland. You’re being harassed by an underground monster that sticks a claw up to tear into you. It’s a tiny corpser! Aim for the head when it pops up, and you should take it down.
Press onwards and you’ll face more Locust, complete with Tickers and Boomers. Take them down and head for the door, and an ambush will pop up behind you. You should have picked up the Mulcher though, so taking them down will be no problem.
In the next area you’ll have to be quick on your feet. A Siege Beast is tossing explosives at you and if one nails you directly, you’re dead. Not just downed, dead. Keep to cover, push up to the beast, and take out it’s crew. Then take it over and use it to blast the Locust swarming you. Push past them and you’re on to the next chapter.
Chapter 3 - Forced Entry
There’s only one collectable in this level and it’s a tough one. You need to take out all five guards without being spotted. Reload if you can’t. If you do, a side door opens that you can follow to a COG tag. That’s your only collectable for the chapter.
Fighting your way in involves a lot of Locust and another mini-corpser, boomers, and anything else you can think of. Try not to do that.
Once inside you’ll have to fight more Locust, and snipe a few who are on turrets. Now’s a good time to practice with the Longshot if you’re not comfortable with it. Reinforcements will show up and they’ll be boomers, or rather, diggers. Take ’em out and press on.
Push on past the gate and you’re into the trenches.
Chapter 4 - Trench Run
The gas barge spots you and forces you inside. Run through the trenches and avoid its fire. That’s why it’s called Trench Run, get it?
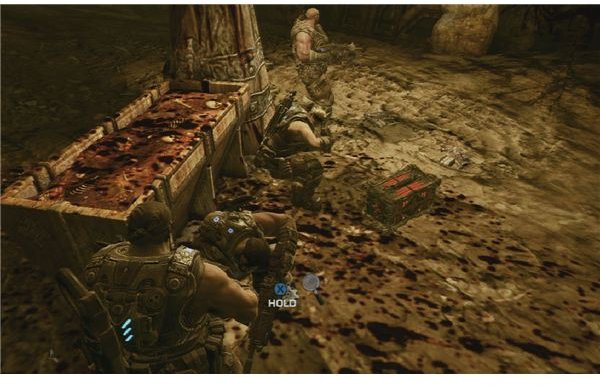
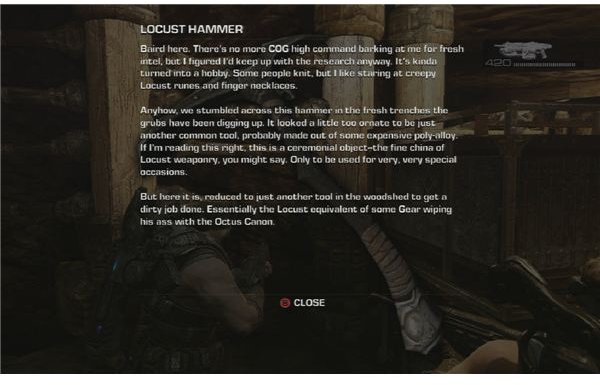
At the end of the trench, when you run uphill, look for the Locust Hammer behind some crates. It’s your one and only collectable item in this chapter.
Push forward, fight, push forward, fight, this chapter isn’t all that interesting. There’s nothing all that new to come up against. You get to run through an area with some swinging obstacles, but they aren’t really that big a deal. You’ll have to fight another mini-corpser, but those should be easy by now.
Oh, right, there is also the boss. The Mother Corpser and a room full of eggs that spawn tiny corpsers. Kill all the hatchlings and the mama comes out to play. You’ll need to shoot out its eyes. Each time an eye dies, you’ll have to face down more little corpsers. Take out all four eyes and it’ll go berserk, charging around the room and bringing down the roof. Take the chance to escape!
Chapter 5 - Hijack
After a cutscene, you’ll have to fight some airborne enemies and push forward to hijack a barge, like you’ve been planning all along. Reinforcements will come on other barges and from all over the place.
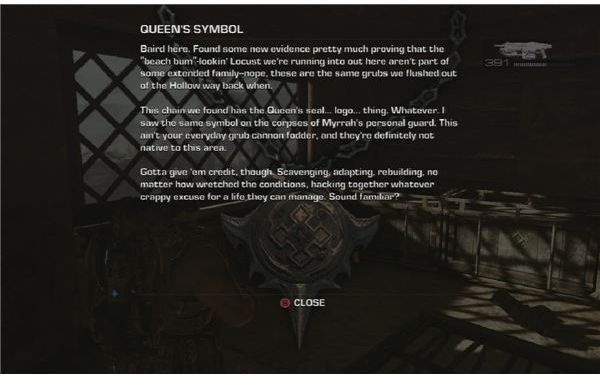
When you pass through a raised gate, there’ll be an odd tower to your right. Enter it and you’ll find this chapter’s collectable, the Queen’s Symbol.
Next you have a defend-the-platform setting, killing gas barges and things that jump off said gas barges. Once you do that, finally you’ll be able to hijack a barge. Overall this is a short, simple chapter.
Chapter 6 - Airborne
You start off on the barge and get to kill a few other barges, but then it’s time to land.
When you land you get the exciting prospect of taking out even more Locust. At least the Lambent aren’t back yet, eh? Always easier fighting monsters that don’t explode when you look at them funny.
Well. Except for the Reavers you have to fight.
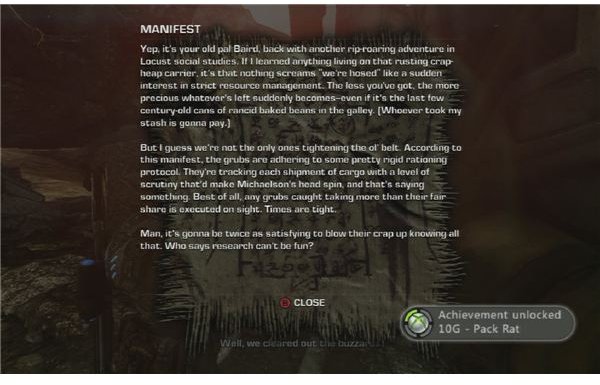
Once you get through Dizzy’s fort, look for a 20-wheeler truck. Near it will be a Manifest – that’s your collectable. Kill the four Reavers that show up and look around for a destroyed building. Inside it, on the second floor, is your next COG tag.
This is another short and sweet chapter, and it’s easy to replay over and over for the farming. There’s plenty of ammo and lots of fun guns to play with.
Chapter 7 - Touchdown
This chapter takes place entirely on the barge, and it’s a great place to farm for the Seriously 3.0 achievement. Take out the barges and you can build up your force multiplier, and if you put a second player on splitscreen, you can get the Number 1 medal as well.
You basically get to defend yourself from a swarm of barges and reapers, but you have the barge turrets to shoot for you. Eventually you’ll have to face down the boss, who will shoot you down. Don’t worry about winning, it’s scripted. Crash land and it’s cutscene time. Welcome to the end of Act 2. Want to keep going? Check out our next article.
References
- Hidden Item Locations from Cheat.CC
- Source: User’s Own Experience
- Images of Gears of War 3 - Copyright of Epic Games
This post is part of the series: Ultimate Gears of War 3 Walkthrough and Collectable Guide
This guide will point you in the right direction to find each collectable item in the game, locate all of the COG tags to remember your fallen friends, and fight your way past all the tough boss battles and new enemies. Tips and Tricks for every chapter within!