Fable 3 The Masquerade Walkthrough

Fable 3 The Masquerade - An Evening to Remember
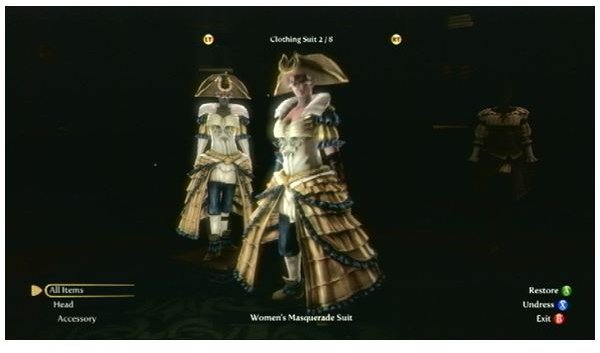
This quest picks up right where “Bowerstone Resistance” left off. To initiate the quest, slip into your Masquerade Suit and meet Page at the rendezvous point outside of Reaver’s Manor in Millfields. Reaver’s butler greets you at the entrance, commenting on the fact that you’re apparently quite late and that the party (and alcohol supply) is already winding down. Nonetheless he leads you through to the party hall without quarrel, despite the fact that you’re armed to the teeth. Since Reaver is infamous for his debauchery, we suppose his guests being equipped to start a war doesn’t come off as too bizarre.
In the next room it is revealed that Reaver was expecting you. He has decided to make you the night’s entertainment, forcing you to fight waves of varied opponents. Who you combat is decided by the Wheel of Misfortune, a device that will be familiar to fans of Fable 2. Though it is designed to appear random, the order in which you fight a specific type of enemy is predetermined before the wheel spins. First up: Hobbes.
Fable 3 The Masquerade - Hobbes, Hollow Men and Mercenaries

Hobbes shouldn’t pose too much of a threat by now, as you’ve encountered them multiple times before. Area-of-effect magic spells are good for clearing the room of the less formidable Hobbes, while charged targeted spells make quick work of the larger ones. Roll away from any Hobbe that gets close enough to strike you at melee range and eventually you’ll emerge victorious.
Head back into the central chamber for another spin of the Wheel of Misfortune. This time you’ll be fighting Hollow Men, another familiar adversary. You’ll find a chest containing a Slow Time Potion before entering the combat arena. Use it if you feel overwhelmed, but otherwise adopt the same strategy used to defeat the Hobbes. If you can avoid using it, saving it for one of the harder upcoming rooms is recommended.
The third spin of the wheel has you fighting mercenaries. This round gets a little dicier as you’ll fight a large mercenary that is essentially a clone of Saker, who you fought in the “Leaders and Followers” quest. He doles out heavy melee attacks at close range and fires off molotov cocktails when you’re at a distance. He will be accompanied by regular mercenaries as well; use charged magic and your gun to whittle down the large mercenary’s health, and area-of-effect spells to deal with his cronies.
Fable 3 The Masquerade - Sand Furies and Balverines

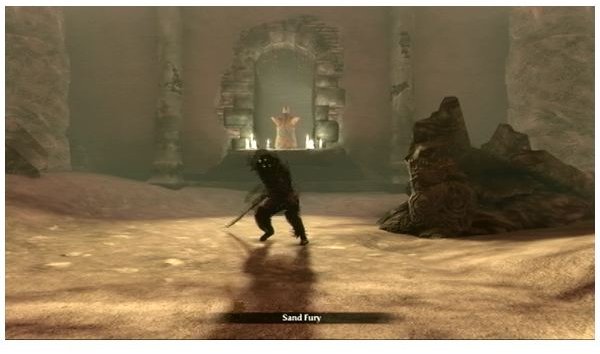
The fourth round introduces a brand new enemy type: the Sand Fury. These desert vixens are quick and merciless. Roll often to avoid their melee attacks. If you have any Slow Time Potions in your inventory, this is the perfect time to use them. Stick to using your gun and area-of-effect magic, as targeted spells take too long to charge for enemies this agile.
Return to the central chamber for the last encounter: balverines. These suckers deal loads of damage at melee range, so keep your distance as much as possible. Slow Time Potions work wonders here, and don’t be shy about using a Health Potion if your health dips too low. Charged spells are effective but balverines have a tendency to dodge them, so employing your gun is a more effective alternative. After you kill all of the beasts, Page tries to shoot Reaver who is observing from the balcony above. Reaver effortlessly deflects the shot and makes his hasty retreat.
Outside of the manor, Page will want a promise to improve conditions in Bowerstone once you become ruler. Commit to the promise and you’ll gain her and her followers’ loyalty. A portal opens to the Road to Rule where another set of new upgrades awaits. Purchase your desired abilities and depart the Road to Rule via the Cullis Gate to start the next quest.
Return to the Ultimate Fable 3 Walkthrough index
This post is part of the series: Fable 3 Walkthrough Part 2
A full, in-depth walkthrough of the Fable 3 main storyline. The second part of our walkthrough covers the quests “Mistpeak Monorail”, “The Hollow Legion”, “Bowerstone Resistance”, “The Masquerade” and “Traitors”.
