Darwinia Walkthrough: Mine
Mine: Clearing the Refinery
Welcome to the Mine. You job here is to put the Mine back in working order so that you have the resources to build weapons for use against the virus.
We’ll do as the doctor suggested and head to the mine first. You’ll need to create a squad and an engineer. Take control of the squad and head towards the incubator further inland. Wipe out the viruses surrounding the incubator and take it over with an engineer. Once you’ve done so the doctor will explain your immediate objective. You need to clear a path to the refinery on the plateau ahead and guide some Darwinians to it so it can begin operation.
There is another incubator just in front of the path leading up to the refinery, and it also is surrounded by viruses as well as a centipede. Kill them and take over the incubator. You’ll now have a large number of Darwinians surrounding both incubators. Take your squad up the path to the refinery and kill the viruses there. There are two Triffid which will shoot viral eggs towards the second incubator you captured, so you’ll probably have to spawn a second squad to guard the Darwinians there.
Once you’ve cleared out the refinery you’ll need to promote some Officers and tell them to head up to the plateau. They will main the refinery automatically. The doctor will let you know your next goal. You need to open the mines so that twenty primitives can be refined and prepared for transprot to the Yard.
Mine: Moving on the Mainland
To do this you’ll need to access the mainland. There is a control tower and radar dish beyond the refinery. Take those over with an engineer and teleport a squad over to the mainland. Before we go any further, bring and engineer over as well and grab the research to the left of the radar dish your squad teleported to. This will give you access to the airstrike attack.
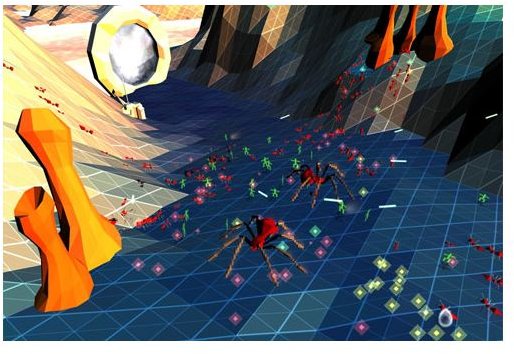
There is a large group of viruses to the right of the radar dish. It includes centipedes, spore pods, and a new spider opponent which will randomly jump at your squad. Ruin their day with airstrikes. Keep in mind, however, that you can only deploy as many airstrikes or grenades at a time as you have squad members. If you deploy all your airstrike markers you won’t be able to fire any grenades at all until the airstrikes are complete.
Once the viruses are destroyed it is time to go deal with the Tiffids that have been firing eggs at us this entire time. They are located at the corner of the mainland closest to the second incubator you captured. Use grenades to take them down and then head towards the Trunk Portal behind them, cleaning out viruses along the way.
Once you’ve taken over the Trunk Portal its time to head in and take over the mines. There is an incubator towards the center of the mainland surrounded by viruses. Kill the viruses and take the incubator over. Press into the canyon until you come to the Tiffids at the end. Kill those and then circle back to the incubator to make sure no viruses have been hatched by the eggs the Tiffids shoot.
Mine: Making More Darwinians
When you have everything cleared out bring in some engineers quickly to collect souls and convert them in the incubator into Darwinians. Once you have ten or so promote an officer and use him to send the Darwinians up the cliffside to the left and to the mining facility. When some Darwinians have begun to man the mines the doctor will tell you that you now need to bring online the Trunk Portal to the yard. Go to the radar station on the mainland and point it at the radar station located on the island with the Trunk Portal on it and then teleport a squad over.
Be ready for a fight. There is a large group of viruses and two spiders here waiting to punch as soon as your squad arrives. Take them out and the reprogram the trunk portal with an Engineer. The doctor will let you know you’ve completely all primary objectives and you can move on.
Generator: Taking the First Solar Panels
Welcome to the power source which makes Darwina possible. You goal here is to turn on the power so that the Yard can used again, but you have more immediate issues because you start this level in a valley full of viruses. Spawn a squad and work your way towards the radar dish at the end of the valley. Once you’re at the radar dish spawn an Engineer to take it over, but don’t teleport yet. There is an incubator over the ridge guarded by viruses and a centipede. Clear the area out and then take over the incubator. Use an Engineer to collect souls so that you can start making Darwinians.
It is time to take some solar panels. Promote an officer and have him send Darwinians to the nearest of the three solar panels, then promote two more officers to split the Darwinians in alternative directions once they get there. The solar panels should glow blue once they’re active.
Generator: The Hub
With that complete, use the radar dish you’d taken over earlier to transport a squad to the hub island in the center of the map. Take out the numerous spiders and centipedes and then use an engineer to take over the building in the center of the island. You’ll now see a read-out of how much energy you’re making on building. Your goal is 65. Right now it will be averaging around 31. With that taken care of, use the radar dish on the hub island and aim it at the radar dish on the island to the right, then teleport a squad over.
Proceed to the incubator, killing viruses along the way. Be sure to have an engineer ready to take over the incubator as soon as the coast is clear so that you can start collecting souls and producing Darwinians quickly. Once the incubator is online head up the mountain in the middle of the island and kill the centipede roaming around the top. Direct an Engineer to take the Escort Trunk Portal on the far side of the island and then take over the radar dish at the top of the mountain.
Generator: Completing the Grid
Now head back to your incubator, which should have produced a good quantity of Darwinians by now. Promote two officers, one directing Darwinians to the clump of three solar panels and one directing them to the lone solar panel near the radar dish you arrived through. The building on the hub island should now let you know you’re producing around 50 units of energy, just short of what you need.
One more island to go. Take your squad and transport to the last island using the radar dish at the top of the mountain. This island has two Spore Pods and lots of viruses as well as a two Tiffids. Wipe out all of the opponents. Be sure to bring along some engineers so at least some of the souls can be collected, as there is no incubator on this island. Once the island is cleared, change the orders of your officers so that Darwinians cross to the new island and man the solar stations. You will only need to capture two of the solar panels to bring the power grid online, and then you’re done with the level!
This post is part of the series: Darwinia Walkthrough
The Darwinians need your help. The virus has taken over your world is hunting them in a form of digital genocide. It is up to you to save their world, and this Darwinia walkthrough provides a step-by-step guide on how to do so.