Darkest of Days Walkthrough - A Trip to Vesuvius
Into the Ash
I found that it’s possible for mother to not recognize that you’re done with the last arc and not give the briefing. You just miss a quick explanation though. They tracked him to Vesuvius and the whole area is a free fire zone.
No trick to this one. Just take in the scenery and see if your computer can handle all of the falling ash and crowds without lag. Just head along the linear path until you get to the gates. Walk inside and down the street. Turn into the first courtyard to meet up with Dexter and our new friend Bob. Bob’s pretty capable, so don’t take your orders as an escort mission. Go out the little side door to start the battle with the opposition.
The problem is that you’re basically in a random battle. The opposition spawn in pairs at their portals and your agents spawn at any captured portal. After that, it’s all up to the AI and what they can do. For now, just focus on shooting your way across to the closest portal. Kill the few guards that should be in place, and focus on switching the calibration. You don’t have to kill all of the guards first, just get it switched so that reinforcements start coming through. I also suggest that you trade out the AR 55 for an M7 rifle from a downed opposition agent.
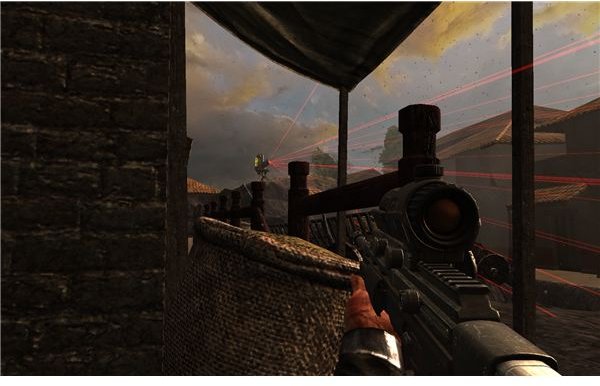
The second portal is also right on the path and easy to find. It’s just around the corner after the broken part of the street. Take them out and reverse it. Then charge forward and toward the next portal. You should be able to see it on the other side of a fence. Go down the street to the right until you get pulled into a little cutscene that introduces the automatic turret. We’ll deal with that in a minute. Just get off the street and behind the fence with Bob and the rest of your men. Charge inside and gun down the agents here. The pillars make for great cover.
The Marketplace Battle
You need to blow up the turret now. Step outside and crouch behind the barrels. Then quickly move up to the crashed cart. Heal up for a minute, and then sneak over to the left and get behind the fence. This should be out of it’s range. Move forward and quickly cut back and up the slope. Plant the charge on the side and blow it up.
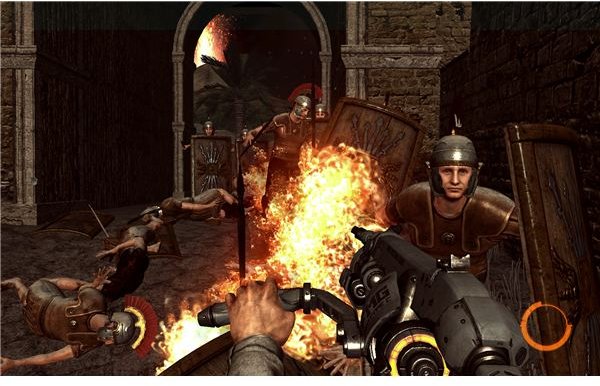
Once that’s done, you need to charge up the street and knock out the next portal in the side room. Nothing new here, since you just need to gun down a few more agents and switch it. Then push forward and grab the other one up and to the right. The only interesting note is that there may be some Roman guards left, who have the absurd ability to deflect bullets with their shields. Just line up a head shot or shoot them when they move their shield away.
You need to move a bit further down to the marketplace. Before you bother engaging the guard at the amphitheater, go down and to the right to knock out the portal in the little side room. I’m having you start this one up because we’ll need the reinforcements to take the full marketplace. On that note, there are probably a ton of agents moving in on your position. Take cover inside and ambush them as they rush the door. The shotgun and the M7 are fine. Then leapfrog from stand to stand until you can get to the portal outside and reverse it. Once it’s flipped, backtrack and go down the side street to flip the new portal that should be on your map. You’ll have to go around a fruit cart, but it’s not much of a challenge. Just duck inside and then back out.
Once that’s done, you should have an army in the marketplace holding back the opposition. Just give one last push to reverse the last portal in the back. Once the amphitheater entrance is clear, plant some C4 on the door and blast your way in. Then go inside to find the opposition’s main base.
The Amphitheater
You’ll have a few agents to help you, but they tend to die quickly. Don’t count on them for more than a distraction. You also shouldn’t bother with trying to kill all of the agents. They spawn too fast and they’re not your main objective. Just flip the 3 generators.
The first one is easy. Just go down a bit and up the tower. Hold “e” for a second to flip it to your side. Then go back and to the main entrance. Use the shotgun and M7 to clear a path. Don’t worry about conserving ammo for either, we’re almost done with this bit. Go up the stairs you should have seen as you entered, then walk up and over to the right to find a generator guarded by a few agents. Blow them away and flip it. Drop down and blast your way to the very back and duck inside the little hallway with the open arches. Go inside and up the stairs to find the last generator. Once it’s flipped, KronoteK will atomically capture the amphitheater. The peace isn’t long though, since 3 heavies and a few agents will come in to break up the party.
This in itself isn’t too tough. Pull out the M7 and unload on the group of heavies. Take cover when they get close. It will take them a minute to sight in and fire their powerful weapons, so you’re not in too much danger. Pick off the few agents who should come out to flush you out. Then score about 10 head shots at close range to finish off the heavies. This is much easier than it sounds, especially if you upgraded your rifle’s ammo capacity.
Once the yard is clear, you just need to go outside and jump into the portal.
A Trip to The Arena
This second part unfortunately strips you of your cool loadout, which is alright since we’ll get a better one in a minute. Go forward and gun down
the few agents until you find Dr. Koell. After a less than successful rescue, you’ll get to join the main assault force. Dexter should give you a cool new toy once you see the wave of heavies. This is a long distance flamethrower, so enjoy it. Looking down the sight makes it start a big flame at the target. From this point on, it’s pretty chaotic and I won’t be able to give good numbers on the opposition. Just try to stay alive.
Move into the field on the right and burn down the normal agents. If you see any heavies, sight in the gun and use the alternative fire to heavily wound them. One more shot will take them out. Push forward and try to keep a few agents alive. Stop and look for an AMP 60 that one of the opposition agents should drop, since you’ll really need one of those for the rest of the level. It’s great for killing agents and you won’t need the shotgun.
Use the flamethrower to continue the push into the next series of telesyncs. These are just more portals, so nothing has really changed. Get behind the big statue and knock out the portal by it. You can just keep using the flamethrower as usual or switch to the AMP 60 for a little bit. Jump down and take out the next portal by the bushes, and then get to the final one across the courtyard.
One Last Ambush
You should have a steady flow of agents at this point. Accompany your reinforcements forward but stop when you are 70 meters from the target. A group of several heavies should start marching toward you. If you use this wall for cover, then they are easy targets. Use the alternative fire on the flamethrower to burn them at a distance. Then charge up and over the wall. Burn up the 4 agents staring at the water, then go up the hill to the left. This part is just one big ambush. If you have a lot of trouble with it, you can hang back and wait for your reinforcements to catch up. Otherwise, move to the left and use the flamethrower to take out the agents. You should be able to stay by the stone wall and burn them all at a distance. There’s one heavy to the right, so burn him out with a fireball. Then go all the way to the back left and over the wall.
Some Roman guards are also in your way, but they’re no match for your flamethrower. Just hold it down to burn them out. Just be careful of the gate though, since another 8 men should charge through as you cross it. Fall back and burn them at a distance.
The Arena
After this point, you just need to join up with the large group rushing toward the area. Go through the door once they blow off the slab and then run inside for the largest battle yet. Push forward with all of the reinforcements you have and get ready for the big finish. Stick to the wall with your allies and burn out the attacking agents and heavies. Don’t go forward. Just follow the wall to the right and clear out the surviving heavies. Then use your AMP to take out the snipers on the roof. Once that’s done, go over to the far right and over the hill to kill the men in the little bunker. You should be able to burn them out easily at this distance. Once they’re dead, you can plant C4 on the door and get inside the arena itself.
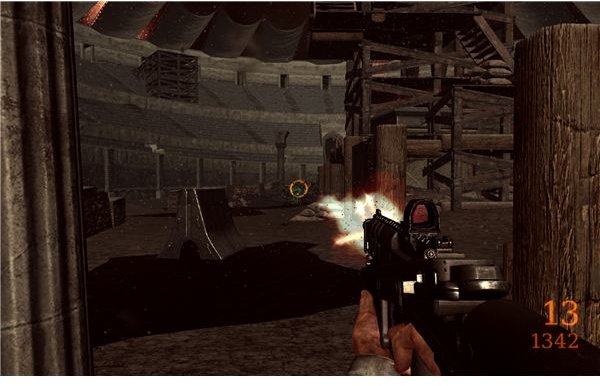
This can be very tough or very easy. Did you pick up an AMP 60 like a told you to? If yes, then it’s easy. If not, reload and grab one. There are at least 20 agents and 5 heavies in here. Charge in with the AMP 60 drawn and fire wildly at the tower to let the auto-aim kill the guards. Then crouch by the left wall and aim into the center of the approaching mass. Hold down the trigger to substantially thin the crowd. After that, fall back and watch your right for surviving agents slipping by on that side. Then just wear down the heavies. After that, go up the steps and approach the turret. You should be able to slap the explosives right on it after you climb the tower.
Go through the now accessible passage and up and around to Dr. Koell. Travel back with him to wrap up the game.
Secret Mission
There’s also a secret mission. I won’t describe it, since it’s a fun defense mission that’s mainly a playful version of the credits. You can unlock the secret mission in Darkest of Days by going over to the wooden door during the epilogue with Koell and Strinko. You should be able to unlock this door. Just do it and wait for the end. Once it wraps up, you’ll get to play the secret mission. If you missed it the first time, then you should have a save labeled “Briefing Room” that will take you to the epilogue.