Agharta and the Dark Dungeon - A Detailed Castlevania Lords of Shadow Walkthrough
Castlevania Lords of Shadow Walkthrough – Agharta
At this point in the game, you should have completed the Waterfalls of Agharta section. If not, review part 4 of this Castlevania Lords of Shadow walkthrough.
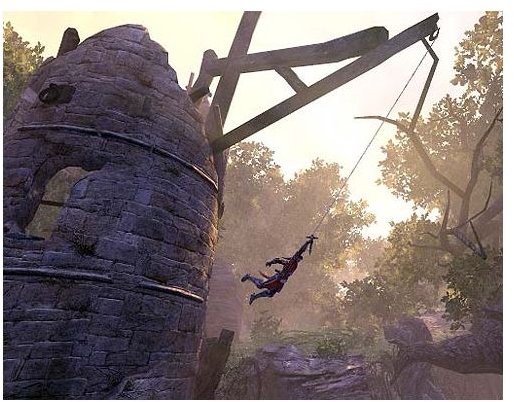
As the level starts, Gabriel has an encounter with a mysterious blonde woman who speaks telepathically. She beckons him to follow her. You must find a way. Walk over to the small steps to the right. Jump and press R2 to grab a grappling point to get across a gap. Move around a path located on the left. Trolls will appear. Kill them off and grab the small scroll from the corpse.
Walk back the way you came into this area and go down some steps. Lycans (werewolves) are here and immediately attack you. Wipe them out and walk around until you reach another grappling point. Swing across the gap.
In this small area that has a large group of wooden logs by a gap, a Warthog will appear. Fight him until he becomes stunned. Press the R2 button and then the square button when the white circle icon appears bold. When you have control over the Warthog, use him to jump across the gap. Strangle and dismount the Warthog.
Walk around this area and you will encounter some trolls. Fight the big troll until he is stunned. Take control over him by pressing the R2 button and then the square button when the white circle icon appears bold. Use the troll to eliminate any other small trolls that get in your way. Smash through an iron gate that is nearby. Strangle and dismount the Troll.
Climb up a small wall for another fight with some Lycans (werewolves). Attack the large Lycan until he is stunned. Take control over him by pressing the R2 button and then the square button when the white circle icon appears bold. Use the Lycan to jump across a gap (tap the left stick twice and press X to jump). At this point you will reach the mysterious lady who immediately jumps away again. Strangle and dismount the Lycan. Climb down the nearby wall. Press R2. End of Agharta level.
Dark Dungeon
At this point in the Castlevania Lords of Shadow walkthrough, Gabriel will need to work a way around some wall by going across some small ledges. Jump (R2) and climb the wall until you reach the inside of the dungeon area. Pick up the scroll from the corpse. Walk up a set of steps. You will then encounter the mysterious lady again. She jumps away. The pathway ahead needs two rune keys.
Explore the area and find another corpse with a scroll. As you walk around, you will encounter some flying gremlins. Eliminate them and pick up the rune key off a corpse nearby. Around the corner from here, pick up a shadow gem.
Go back to the locked door and place the rune key in one of the locks. This will drop down a portion of the walkway that you will need to access the other rune key. Walk behind the rune key lock area down to a small platform. From here, you will need to walk to the right to reach a small cave area. Fight a spider and some Gremlins that appear. Wipe out the gremlins and then stun the spider so you can take control over him (R2 and then square button). Use the spider to break through a gate using his web attack (press the triangle button). Strangle and dismount the spider. Walk through the gap in the gate. Pick up the second rune key from the corpse. Use the nearby health font if needed.
Go back to the rune key lock area. Watch out for Gremlins! Place the second rune key into the lock. This will release a bridge that allows you to cross over into another area. Walk across and past the doorway. Climb up the nearby wall. Jump and climb until you reach another area with some Gremlins. Fight them off. Now you will encounter the mysterious lady, who tells you her name is Claudia. End of level.
Castlevania Lords of Shadow - Sanctuary Entrance
After the completion of the Dark Dungeon, Gabriel will have some dialog with Claudia. Interesting information is given. You will need to find 4 shards of a dark purple crystal in order to move forward in your quest.
Explore this area carefully. Nearby is an encounter with some small Lycans. Defeat them and pick up the scroll from the corpse. Climb a small wall. Go to the left and jump (R2) to cross over a wide gap. More Lycans! After you defeat them you will find one of the crystal shards. Walk Gabriel towards you to find the second crystal shard in a small alcove.
Continue exploring. In a large area, you will have a battle with 3 large Lycans. The easiest way to defeat them is to back Gabriel in the lower right corner (where you came into this area) so you can attack them one at a time. If you go in the middle of this area, they can easily surround you and do a lot of damage. Once you defeat them, climb up the wall that is towards the back. Walk across and climb up another small wall to reach a health font, use it if needed. Walk Gabriel towards you to find the third crystal shard. Jump down to the area below on the right. Here, you will find the fourth crystal shard. At this point, a large troll will appear. Stun him until you can take control (R2 and then the square button). Use the troll to smash through a barrier nearby. Strangle and dismount the troll. Go through this area to go back to where you started in this level.
Now that all the crystal shards have been retrieved, they become a large dark crystal. Place it in the glowing statue near where Claudia and the golem are standing. Go through the opened door. Looking around you realize that the dark crystal is needed to activate some statues located in this area. Go back and retrieve the dark crystal from the statue that opened the door. Place the dark crystal on the small glowing statue that has a lever on it. This will cause the statue to emit a laser light. Have Gabriel pull the statue lever until it points towards the other statue located in front of it. Go to the second statue and turn it until the laser light points to a third statue. Turn the third statue to point towards the first statue. Finally, go back to the first small statue and turn it until the laser light points to the large door in front of you. The door will then open. End of level.
Sanctuary of Titans
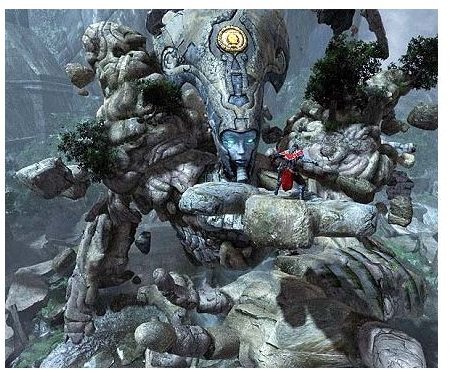
In this area, you will encounter a Titan. To destroy her, you will need to climb up and destroy the four rune weak points on her body.
Stun the Titan by waiting until she throws a rock at you. Press the R2 button to catch it and immediately use the left stick to swing it back at her. When done correctly, the golem will rush the stunned Titan and chop at her leg. At this point, you can run over and climb up the Titan (R2). Carefully climb up and around the leg of the titan. Press R2 when she shakes her leg and body. When you see a white icon you can swing over to, press the R2 button to get across. Climb down carefully to reach the first rune point. Attack it with the square button. When it is destroyed, immediately move Gabriel down a bit to avoid the Titan from swiping at you. Continue to climb the Titan. Repeat the same attack strategy for the other rune weak points. When you reach the final one at the Titan’s head, Claudia will throw the dark crystal at you. Press the R2 and then the square button when the white circle icon appears bold. This will kill the Titan when done correctly. Shortly after, some animation and dialog begins. This ends this Castlevania Lords of Shadow walkthrough for the Sanctuary of Titans section of the game.
This post is part of the series: Castlevania Lords of Shadow - Walkthrough and Guide
Castlevania: Lords of Shadow is an action adventure game filled with multiple types of enemies, bosses, puzzles, magic and combat actions. This walkthrough guide will provide details and spoilers on different sections of the game.
- Castlevania - Lords of Shadow Walkthrough - The Beginning
- Castlevania - Lords of Shadow Walkthrough (Part 2)
- Castlevania Lords of Shadow Walkthrough (Part 3)
- Castlevania - Lords of Shadow Walkthrough (Part 4)
- Castlevania Lords of Shadow Walkthrough (Part 5)
- Castlevania Lords of Shadow Walkthrough - (Part 6)
- Castlevania Lords of Shadow Walkthrough (Part 7)
- Castlevania Lords of Shadow Walkthrough (Part 8)
- Castlevania Lords of Shadow Walkthrough (Part 9)
- Castlevania Lords of Shadow - The Castle Courtyard Walkthrough