Borderlands: Jaynistown
From Krom to the Rakk Hive
With Krom Dead and the second of the Vault keys in your possession much of the game is open to you and the critical mission quests become a bit less clear as you begin to find far more complex and interesting quests as well as enemies and bosses which, like the Rakk Hive, are both stranger and more difficult to fight than those battles you have had before.
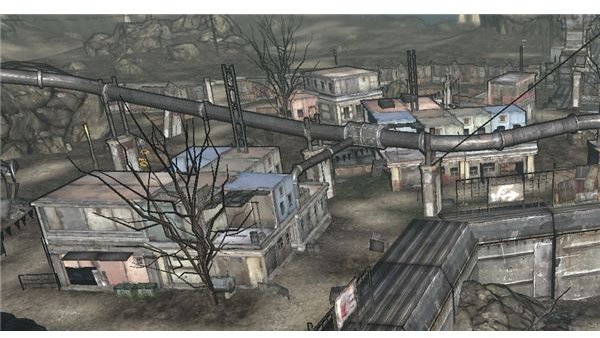
Jaynistown
Once you have defeated Krom the next step of the game is simply trying to get to the Trash Coast. In order to this you need to get to Taylor Kobb. In order to do this drive out to the drawbridge that you have already passed. Here you will find a Claptrap. Talk to him and the bridge will be let down. Go past Haven and the town to the vending machines. Behind them you will find the path to the Trash Coast as well as a man who gives you the next quest to kill the man Jaynis Kobb.
A Brother’s Love
You are given a simple quest to kill the leader of the town of bandits. You can simply walk into the front of this town and fight through the bandits. This will not be an impossible but it is not easy either. The other choice is to go to the tower which is in front of the town. If you go partway up this ramp you can jump onto the rocks that overlook the town. If you are a Borderlands hunter then this second choice is likely the better. Jaynis Kobb is a reasonably easy enemy not much stronger than the average bandit though it is about level 27.
While fighting him you will want to get a good idea of the layout of the town because you will be returning her for a considerably more difficult battle shortly. There are a number of weapons crates and good places to hide and fight which can make later battles a fair amount smoother.
Getting What’s Coming to you
Having defeated Jayne you will return to New Haven. Here you will be given a reward for your services. Go into the small area just outside of New Haven. You will be attacked by a group of bandits hiding in those crates. This should be a reasonably easy battle, but if you have trouble with it you can get on top of one of the crates for a bit of an advantage because this is a very enclosed space.
Unintended Consequences
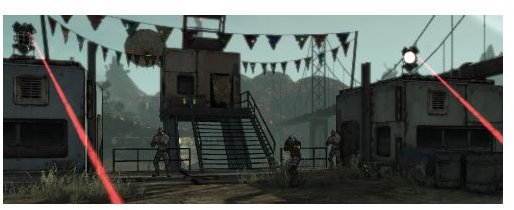
Having been attacked it becomes quite clear that you were hoodwinked just a little by Taylor Cobb. Talk to the leader of New Haven and you’ll be given the job of fixing the town up. This time it is quite a lot harder than it was the last time There are several mounted turrets around the town and before you go into the town you need to deal with them. You can do this reasonably easy but don’t try to go into the town until you’ve dealt with the turret or they will cut you to pieces.
Clear out the town as much as you can because you’re going to have another major part of the battle quite soon. If you look in the gated in area next to where Taylor is you’ll find a vending machine. It is worth checking out if you’re having trouble with the enemy.
Approach Taylor carefully because when you enter the area where he is at two rocket turrets will appear as well as a couple of brutes. Draw out the enemies and kill them or circle around and shoot down the turrets. Taylor will be carrying a rocket launcher so keep moving and try to stay close to limit his value.
A good sniper can avoid most of these by sitting on the bridge in front of the town. This is not as quick, but for a sniper it is valuable while the Borderlands siren can likely move past most of the enemies and kill Taylor quickly if you are over level 27.
Fighting the Rakk Hive
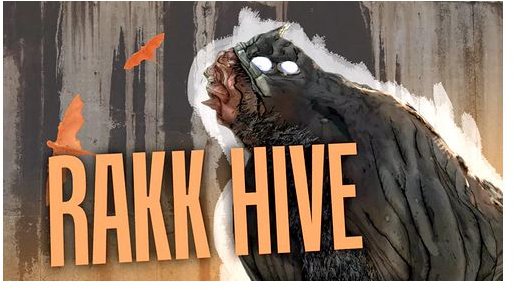
Having defeated Taylor you’ll be allowed to enter the trash coast. Restock your ammo and follow the path forward to your challenge. Here you will find one of the more interesting of the boss battles. The Rakk Hive.
The Rakk Hive is a giant creature which has Rakk appear from its back. Keep your distance from the creature because it will stomp the ground which can do a quite a bit of damage. The main weapon beyond that are the Rakk but they are also your best advantage because if you get knocked down you should be able to kill one easily.
Shoot the four eyes at the front of the creature for critical strikes. This will help do considerably more damage, but they will eventually explode. This will allow you to get most of the damage. You will likely want to use a gun that shoots quickly for this battle as it will take a lot of bullets. Follow the path around and you’ll find the Vault key.
Defeating the Rakk Hive with frineds is also needed to get one of the harder xBox live achievements for Borderlands.
Not Without My Claptrap
Before you can go to the Salt Flats and the final battles you will need to get a Claptrap from Old Haven. Here you will discover a new group of enemies. These are real soldiers of the Crimson Lance. The difference here is that they will be able to use more abilities than those you have seen before, including gun turrets the same as the soldier, handheld shields and give some of the best weapons in Borderlands so far, but they are still similar to any other humans you have fought.
You will have to fight your way through town, including past two gun turrets. Before doing so check the wall to the left when you walk into the town and you’ll find a key and a message. This leads to two more keys which are going to be near where the claptrap is.
The Claptrap is on the opposite side of town and there are a lot of soldiers, but once you know how to damage the enemies you should have a good chance assuming you are at least level 25 and probably closer to 28. From here you can go after the final piece of the puzzle and finally the vault.
Reference
Source: Author’s own experience
Images, Borderlands Wiki, https://borderlands.wikia.com/wiki/Borderlands_Wiki
This post is part of the series: Borderlands Walkthrough
A walkthrough of borderlands covering all of the main storyline quests and giving tips for leveling and getting items as well.